
Cropping a portrait is a decision that directs attention toward the subject’s eyes, expression, pose, and environment while removing unwanted space. Where and how you crop matter. A poorly placed crop can cut off an important gesture and weaken the composition, while a deliberate crop can strengthen the image and make it feel more complete.
The basic rule is to crop between joints, not directly through them. Avoid cutting at the elbows, wrists, knees, and ankles. For headshots, maintain a natural balance between the eyes, chin, and shoulders. Position the eyes near the upper third of the frame as a starting point, then adjust the composition to suit the photograph.
Where to Crop a Portrait


There isn’t one universally correct place to crop a portrait. The safest choice depends on how much of the subject you want to show and which elements contribute to the photograph.
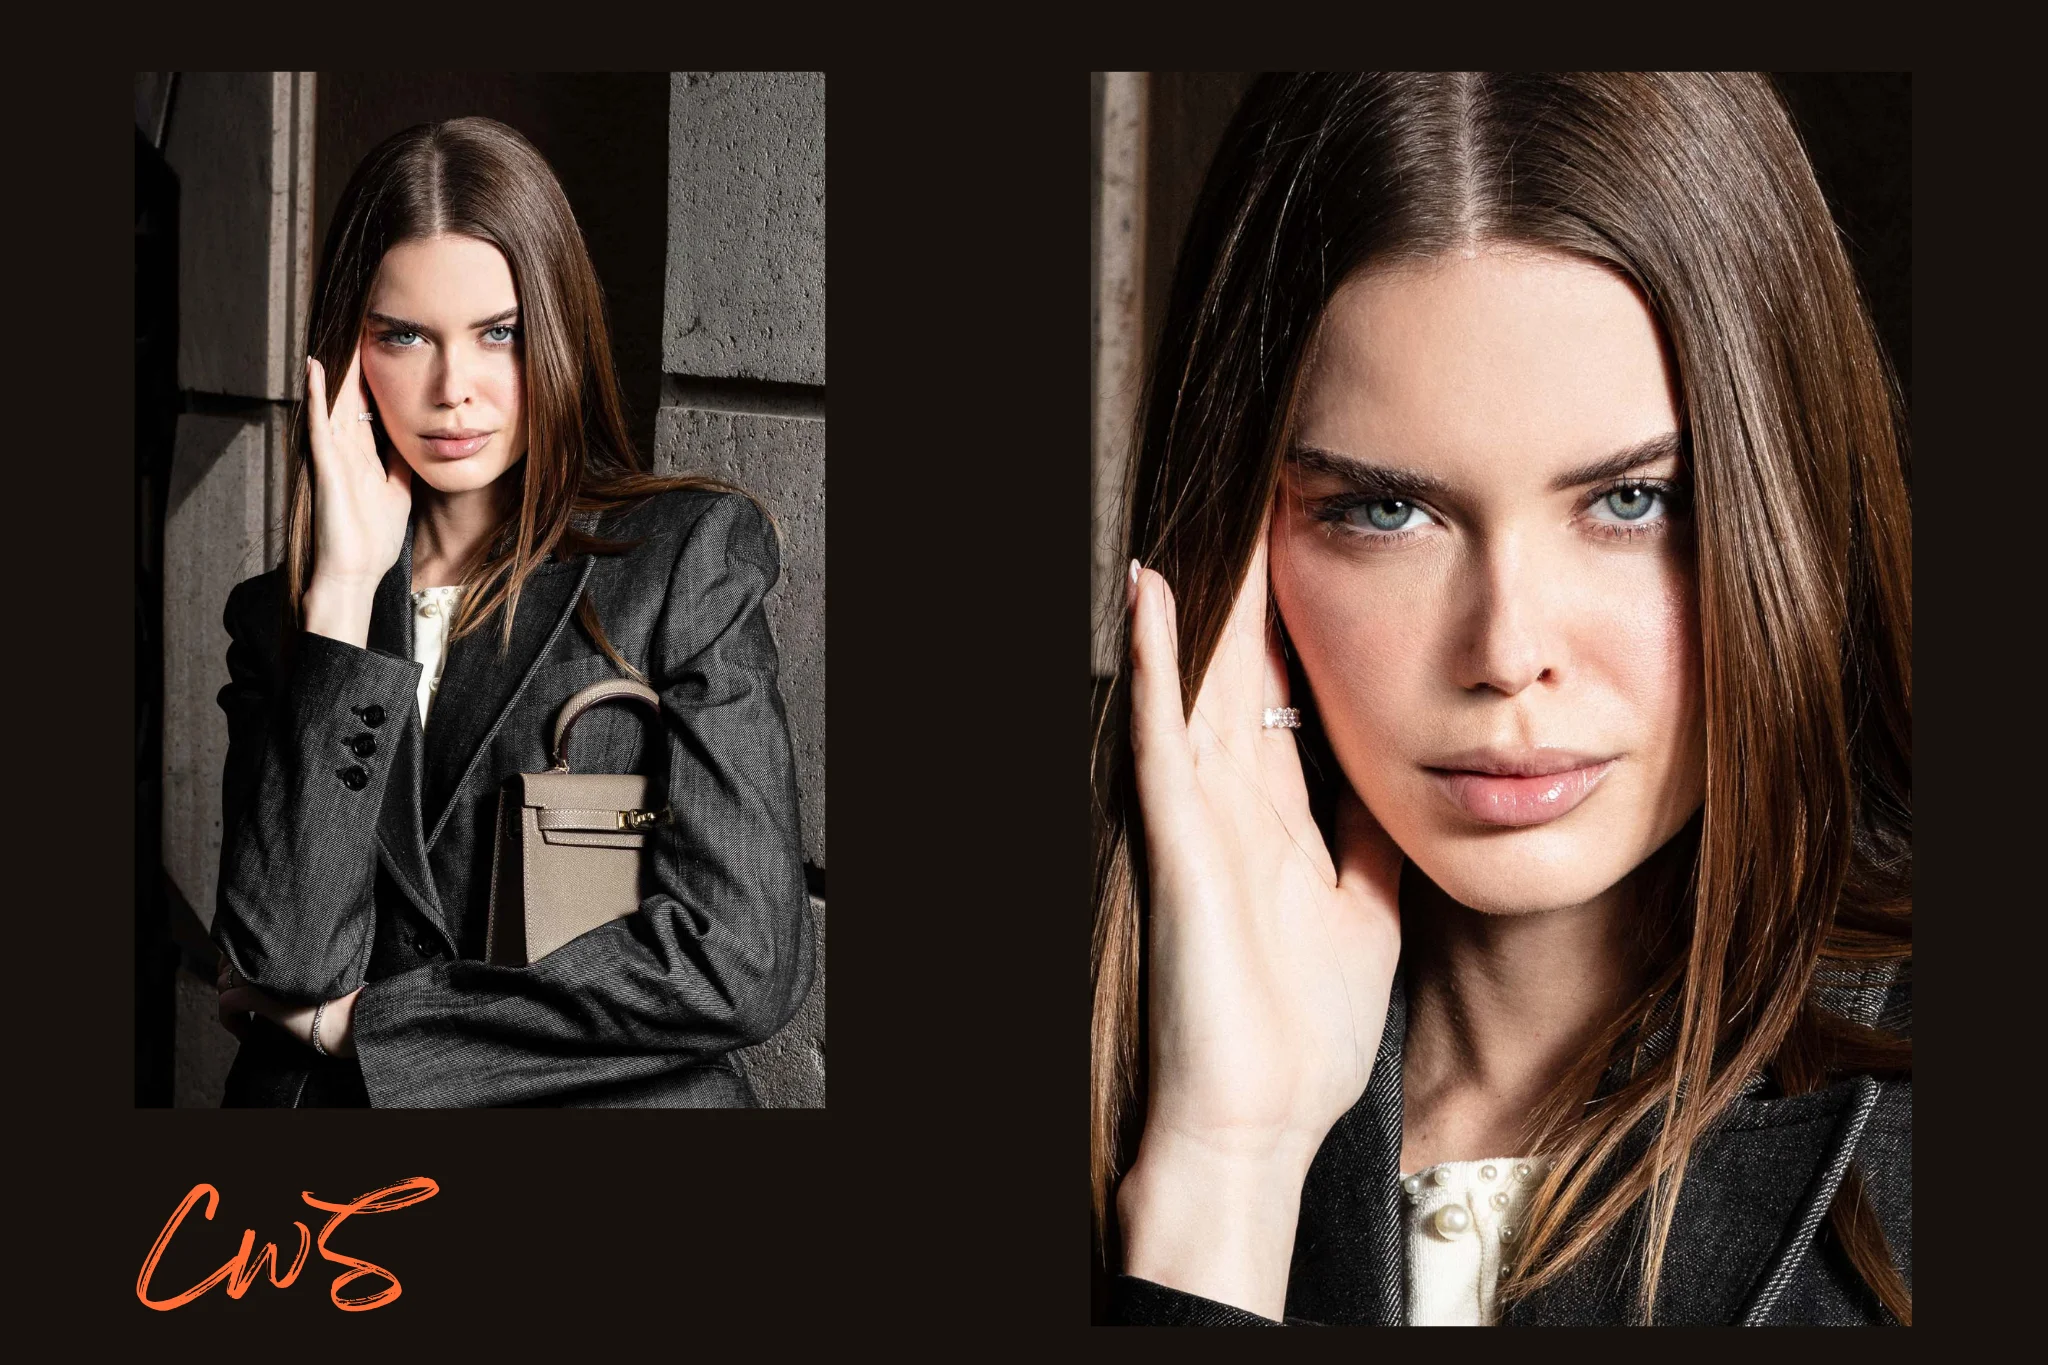
For a natural-looking portrait, crop between major joints rather than directly at the wrists, elbows, knees, or ankles. Common crop points include the mid-chest, waist, mid-thigh, and shin. For tighter portraits, leave comfortable space around the shoulders and face, or deliberately crop through the upper forehead for a more editorial look. These are guidelines rather than strict rules, and the final crop should complement the subject’s pose, expression, and composition.
Portrait Cropping Rules and When to Break Them

Most cropping rules exist because they solve common visual problems. Learn them before deciding when to ignore them.
- Avoid cropping directly at joints: Cropping through a knee, elbow, wrist, or ankle can make a limb appear abruptly terminated at the edge of the photograph. The same principle applies to the arms. If the subject’s hands are important to the pose, include them completely. If they are not, move the frame above the relevant portion of the arm rather than leaving fingertips or part of a wrist visible at the edge. An unusual crop should contribute something visually. Breaking the rule without a reason is not the same as making a creative decision.
- Use the eyes as a compositional anchor: Placing the subject’s eyes close to the upper horizontal third generally creates a balanced portrait with an immediate focal point. For a symmetrical portrait, centered eyes can create a confrontational, almost cinematic feeling. In an environmental portrait, placing the subject lower or farther to one side may give architecture or negative space a larger role. The strongest composition isn’t always the most balanced one.
- Know when cutting off the top of the head works: In fashion and beauty photography, tighter framing can enlarge the face within the composition, strengthen eye contact, and make expression more immediate. Removing a substantial portion of the top of the head can communicate deliberate framing. Removing only a few stray pixels of hair may look careless.
- Pay attention to negative space: Negative space controls the distance between the subject and the surroundings. What matters is whether the empty space contributes to the photograph or distracts from its strongest element.
Cropping changes the mood and story of a photograph. A wide crop preserves more of the environment, revealing where the subject exists rather than simply what they look like. A medium crop shifts attention toward posture, clothing, and the subject’s interaction with the camera. The surroundings remain visible, but they no longer drive the story. A tight portrait removes much of that context, bringing the viewer closer to the subject. Eyes, skin texture, expression, and the interplay of light and shadow become more prominent.
The key is knowing when removing visual information strengthens the photograph and when it takes away the very elements that made the image compelling in the first place.
Best Aspect Ratios for Portrait Photography


The aspect ratio describes the relationship between an image’s width and height. It determines how much space is available around the subject and influences the overall composition. Choose the aspect ratio based on the intended framing and final output:
- 2:3 aspect ratio: This is the traditional ratio used by full-frame cameras and is often our preferred choice for vertical portraits and photographic prints. It preserves more height, allowing additional space above and below the subject without making the composition feel too restrictive.
- 4:5 aspect ratio: A slightly more compact format that can place greater emphasis on the subject, depending on the composition. It often works particularly well for waist-up portraits.
- 5:7 aspect ratio: Offers a useful middle ground between 2:3 and 4:5, maintaining a balanced composition without cropping too aggressively.
- 1:1 aspect ratio: A square format that can create a strong relationship between the subject and surrounding elements. It is also a practical choice for square profile images and thumbnails.
- 9:16 aspect ratio: A tall, narrow format that requires more careful framing because of its limited horizontal space. When the composition supports it, this ratio works particularly well for full-screen mobile content.
If a portrait will be used across multiple formats, preserve the original frame and leave enough usable space around the subject to accommodate different crops.
Common Portrait Cropping Mistakes
Even a strong photograph can lose its impact when an aspect ratio is forced or common cropping mistakes are overlooked:
- Cropping directly through joints
- Removing essential gestures
- Leaving accidental elements along the edges
- Ignoring whether the image has enough resolution for its intended output
Before committing to a portrait crop, ask yourself two questions: What is the strongest element in the photograph? and what disappears when the frame gets tighter? This will help narrow down your choices and create a photograph that feels more deliberate and visually balanced.
Portrait Cropping Guide FAQs
Leave enough headroom to make the composition feel intentional without creating unnecessary empty space.
Getting the composition right in-camera preserves more image resolution and encourages deliberate framing. However, leaving some extra space around the subject gives you greater flexibility during editing, especially when preparing portraits for different aspect ratios or print sizes.
Yes. You can tighten or reposition a portrait crop while maintaining its original aspect ratio, such as 2:3 or 4:5. This changes how much of the photograph remains visible without altering its proportions. Keep in mind that tighter cropping reduces the number of available pixels.
Key Takeaways

- Avoid cropping directly through major joints. Use natural crop points such as the mid-chest, waist, mid-thigh, and shin as starting points
- A wider frame preserves environmental context, while tighter crops emphasize posture, expression, and visual tension
- Match the aspect ratio to its intended use, whether that’s an editorial layout or social media content
- Before removing part of the frame, consider whether you’re eliminating a distraction or losing an essential part of the photograph’s story














Leave a Reply